Essential Water Heater Maintenance Strategies You Need for Longevity and Efficiency
Maintaining a water heater through routine inspections and care can extend its service life by years, reduce energy costs, and prevent unexpected failures. This comprehensive guide provides actionable water heater maintenance tips that homeowners and business owners in Erie, PA can implement immediately. You will learn why regular upkeep matters, how often to schedule professional service, and step-by-step instructions for flushing sediment, inspecting anode rods, and testing safety valves. We’ll also explore energy-saving optimizations, signs your unit needs expert attention, and differences in care for tank versus tankless models. Backed by over 30 years of local expertise from C. Carlin Plumbing’s licensed technicians, these strategies address Erie’s water quality challenges and deliver reliable hot water performance. By following these proven methods, you’ll improve efficiency, avoid costly repairs, and ensure consistent comfort throughout your property.
Why Is Regular Water Heater Maintenance Important?
Regular water heater maintenance is the process of inspecting, cleaning, and servicing critical components to ensure safe and efficient operation. By performing preventive care, you remove sediment, verify safety features, and optimize thermal settings, directly extending the unit’s lifespan and reducing energy consumption. For example, annual flushes can prevent up to 70 percent of common failures caused by mineral accumulation. Understanding how maintenance links to performance lays the foundation for benefits, problem prevention, and adjustments needed in Erie’s water conditions.
What Are the Benefits of Routine Water Heater Maintenance?
Routine water heater maintenance delivers three primary advantages: extended service life, lower utility bills, and fewer emergency repairs.
Before inspecting components or scheduling service visits, consider these key gains:
- Extended Lifespan through Sediment Removal – Flushing prevents scale buildup that erodes tank interiors and heating elements.
- Improved Energy Efficiency via Thermostat Calibration – Verifying and adjusting temperature settings can reduce heating costs by up to 8 percent.
- Cost Prevention through Early Fault Detection – Identifying leaks or corrosion early avoids major repairs and water damage.
Each benefit contributes to reduced operating costs and enhanced reliability, setting the stage for how maintenance tasks thwart common water heater problems.
How Does Maintenance Prevent Common Water Heater Problems?
Effective maintenance interrupts the progression of leaks, corrosion, and thermostat failures by addressing root causes before they escalate. Inspecting the tank for corrosion spots reveals early-stage rust that, if untreated, leads to pinhole leaks. Testing and exercising the T&P relief valve releases excess pressure, preventing burst risks. Tightening connections and replacing worn fittings stops minor drips from becoming major water damage events. Together, these actions form a protective barrier that preserves efficiency and safety over the heater’s service life.
How Does Erie, PA Water Quality Affect Maintenance Frequency?
Erie County’s moderately hard water contains higher mineral content that accelerates sediment deposition in storage tanks, requiring more frequent attention. Regions with water hardness above 7 grains per gallon often benefit from biannual flushes instead of the standard annual schedule. The table below compares typical water hardness levels and suggested service intervals for optimal performance.
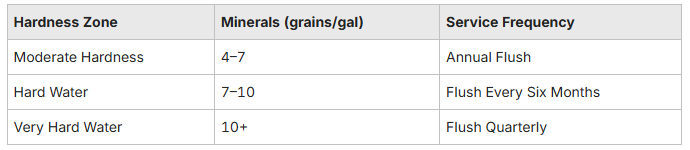
Erie’s water tests frequently fall into the hard category, so adapting maintenance schedules to local conditions prevents accelerated wear and efficiency losses and leads into the next discussion of service timing.
How Often Should You Service Your Water Heater?
Determining the optimal service frequency involves manufacturer guidelines, local water characteristics, and observed performance indicators. Annual inspections are generally recommended to verify component integrity, perform a full system flush, and test safety devices. In hard water areas of Erie County, more frequent attention reduces mineral buildup that compromises heating efficiency and accelerates corrosion. Establishing a consistent maintenance cadence ensures reliable hot water delivery and underpins energy-saving strategies covered later.
What Is the Recommended Annual Maintenance Schedule?
An annual maintenance schedule typically includes:
- Full Tank Flush – Remove accumulated sediment to improve heat transfer.
- Anode Rod Inspection – Check sacrificial rod for corrosion and replace if material loss exceeds 50 percent.
- T&P Valve Test – Verify proper opening and reseating to maintain safe pressure levels.
- Thermostat Calibration – Confirm accurate temperature control at 120 °F for efficiency and scald prevention.
- Safety and Leak Inspection – Examine pipe fittings, valves, and relief lines for signs of leaks or corrosion.
This regimen, when performed yearly, prevents up to 70 percent of common water heater failures and maintains peak operating efficiency.
When Is More Frequent Servicing Needed?
More frequent service becomes necessary when local water hardness, usage patterns, or system age increase stress on the heater. Commercial settings and large households often generate heavier demand, leading to accelerated sediment accumulation and component wear. Signs that call for mid-year attention include rumbling noises, reduced hot water volume, and visible mineral deposits around outlet fittings. In these scenarios, scheduling a six-month flush and valve check maintains efficiency and defers costly replacements.
What Tasks Should Be Included in Each Service Visit?
A comprehensive service visit features a sequence of inspections and adjustments that safeguard performance:
- Visual Inspection of Tank Exterior – Identify rust spots and check insulation condition.
- Sediment Flushing – Use the drain valve and garden hose to clear mineral buildup.
- Anode Rod Assessment – Remove and examine for depletion, replacing if necessary.
- T&P Valve Exercise – Lift and release the lever to ensure smooth operation.
- Thermostat Verification – Test and adjust temperature settings to 120 °F.
- Leak and Pressure Check – Monitor inlet/outlet connections and relief lines for drips or pressure anomalies.
Together, these tasks form a maintenance blueprint that preserves system longevity and efficiency.
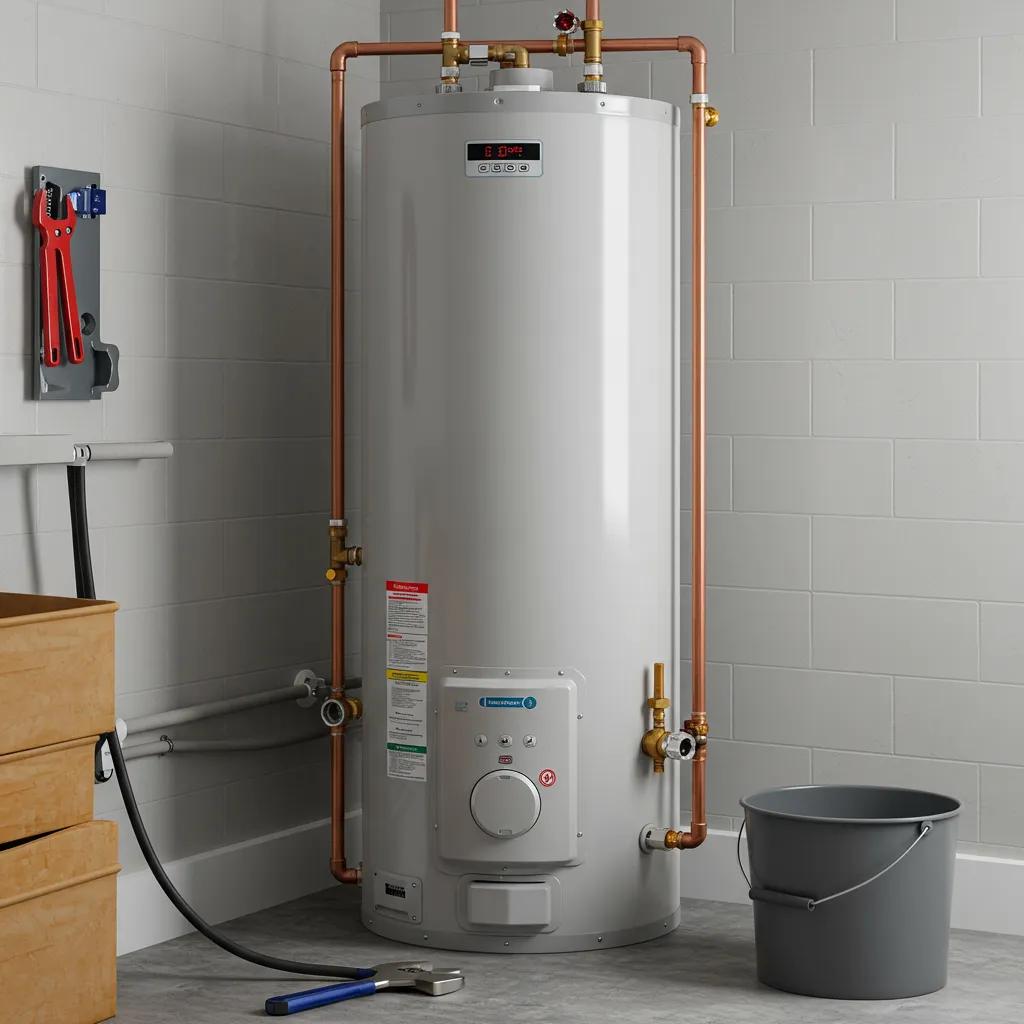
What Is the Step-by-Step Process to Flush Your Water Heater?

Flushing your water heater dislodges sediment that settles at the tank’s base, restoring efficient heat transfer and preventing corrosion. This essential maintenance task removes mineral particles before they compromise heating elements and tank integrity. Below is a concise DIY flushing procedure, followed by guidance on when professional services are recommended.
Why Is Flushing Essential to Remove Sediment Buildup?
Sediment consists of calcium, magnesium, and iron compounds carried by hard water that settle on the tank floor. Over time, these deposits act as an insulating barrier, reducing heat exchange efficiency and forcing the burner or element to work harder. Accumulated sediment also accelerates corrosion by trapping moisture against the tank lining. Removing these particles restores heating efficiency, reduces energy consumption, and prevents premature tank failure.
What Safety Precautions Should You Take Before Flushing?
Before beginning a flush, ensure all safety measures are in place:
- Turn Off Power or Gas Supply – Shut off the electric breaker or gas valve to avoid heat injury.
- Allow Cooling – Let the water cool for at least two hours to minimize scald risks.
- Shut Off Cold Water Inlet – Prevent additional water flow while draining.
- Wear Protective Gear – Use gloves and eye protection to guard against hot water and sediment spray.
- Verify Drain Location – Place a sturdy bucket or connect a garden hose to a safe drainage point.
These precautions establish a secure environment for flushing and lead into the procedural steps.
How Do You Properly Flush a Water Heater Tank?
Follow these step-by-step instructions for an effective tank flush:
- Attach a Garden Hose – Secure the hose to the drain valve and route it to a floor drain or bucket.
- Open a Hot Water Faucet – Vent air and allow smoother draining.
- Open Drain Valve – Let water flow until the tank empties.
- Briefly Open Cold Water Supply – Agitate remaining sediment at the bottom for two minutes.
- Repeat Drain and Fill Cycle – Continue until discharged water runs clear.
- Close Valves and Refill – Shut the drain, turn on cold inlet valve, and refill the tank.
- Restore Power or Gas – Once full, relight the pilot or switch on the breaker.
Completing these steps annually in hard water zones maintains heater health and efficiency.
When Should You Call a Professional for Flushing Services?
While flushing can be a homeowner task, professional intervention is advisable when sediment levels are extreme, access is restricted, or you operate a tankless model. Licensed technicians bring specialized equipment for deep descaling and can diagnose hidden issues such as corrosion beneath insulation. In Erie’s hard water areas, C. Carlin Plumbing’s licensed team ensures thorough sediment removal, prevents damage during service, and integrates additional preventive measures for long-term performance.
How Do You Inspect and Replace Your Water Heater’s Anode Rod?
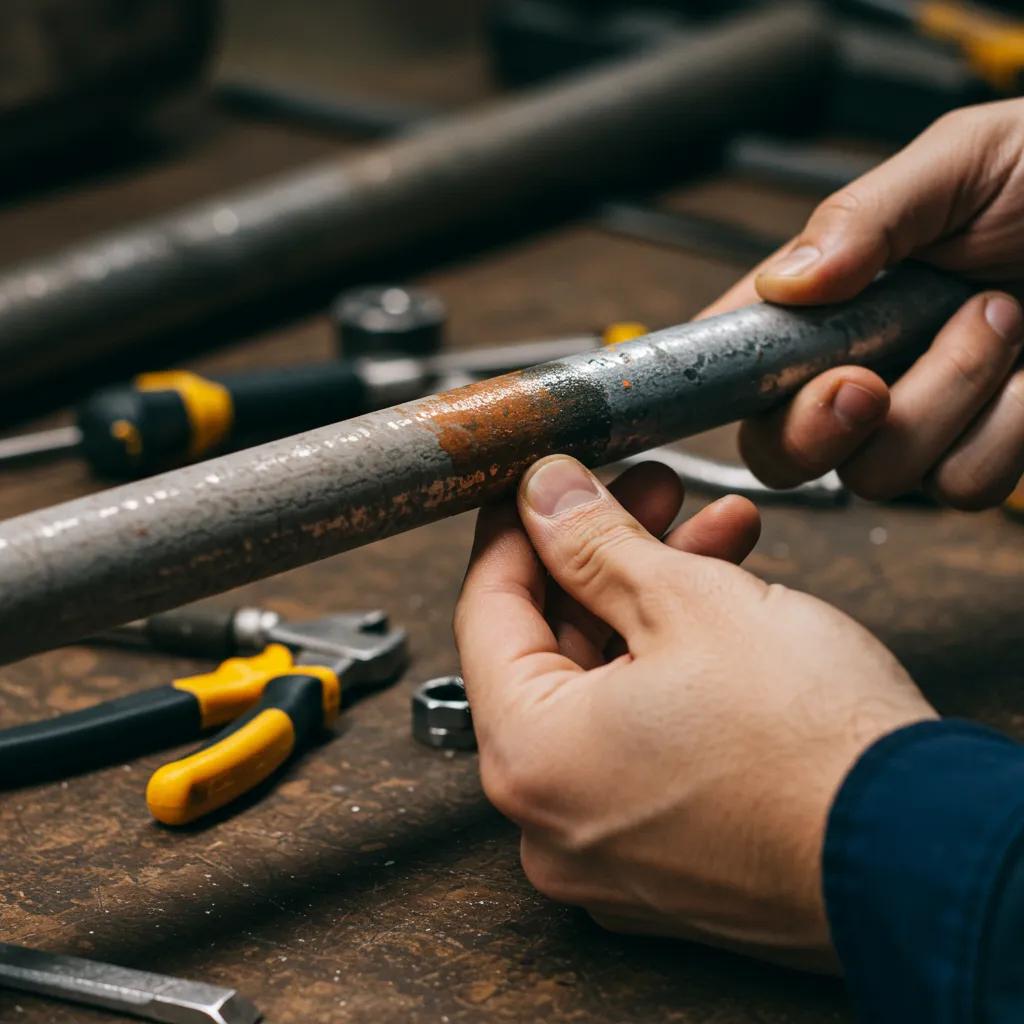
The anode rod is a sacrificial metal rod that attracts corrosive elements, preserving the tank’s interior steel lining. Regular inspection and timely replacement of this component prevent rust and prolong the water heater’s service life. A well-maintained anode rod can add several years of reliable operation before the tank itself requires replacement.
What Is the Role of the Anode Rod in Preventing Corrosion?
The anode rod, typically made of magnesium or aluminum alloy, sacrifices itself by corroding preferentially to the steel tank lining. This electrochemical process draws corrosive particles toward the rod instead of the tank wall, significantly slowing rust development. By preserving the tank’s integrity, the rod ensures that the heater remains leak-free and structurally sound for its intended lifespan.
How Often Should the Anode Rod Be Inspected and Replaced?
Most manufacturers recommend inspecting the anode rod every 12 months and replacing it every three to five years under average water conditions. In Erie’s hard water areas, inspection intervals may shorten to six months, with replacement as soon as more than 50 percent of the rod’s diameter is lost. Adhering to this cycle prevents unexpected leaks and extends tank longevity.
What Are the Signs of a Worn or Corroded Anode Rod?
Visual and performance indicators reveal a depleted anode rod:
- Visible Rod Pitting – Deep grooves or breaks along the rod’s length.
- Rusty Water Discharge – Brown or reddish water indicating active corrosion.
- Frequent Drain Valve Clogging – Accumulated corrosion particles blocking flow.
Recognizing these symptoms early triggers timely replacement and forestalls their escalation into tank damage.
How Is Anode Rod Replacement Performed Safely?
Safe anode rod replacement involves:
- Power Off and Drain – Remove water down to the rod’s entry point.
- Loosen Rod with Adjustable Wrench – Use penetrating oil if rod is seized.
- Withdraw and Inspect Old Rod – Measure loss and check for deep pitting.
- Install New Rod – Ensure proper seating and secure torque.
- Refill Tank and Restore Power – Check for leaks and test heater operation.
While this can be a DIY task, professional service from C. Carlin Plumbing guarantees correct procedures, preventing damage and ensuring optimal corrosion protection.
How Do You Test and Maintain the Temperature and Pressure (T&P) Relief Valve?
The temperature and pressure relief valve safeguards against excessive internal pressure or overheating by releasing water when preset limits are surpassed. Maintaining this valve ensures safe operation, preventing tank ruptures and potential property damage. Annual testing and maintenance of the T&P valve are critical safety steps every homeowner should prioritize.
What Is the Purpose of the T&P Relief Valve?
The T&P relief valve opens automatically when tank pressure exceeds 150 psi or temperature rises above 210 °F, venting water to relieve danger. This safety mechanism prevents tank explosions and protects plumbing components from damage caused by overpressure. Ensuring that the valve functions correctly is essential for occupant safety and code compliance.
How Often Should You Test the T&P Valve?
Annual testing of the T&P valve is recommended by industry standards and most manufacturers. In high-demand or hard water environments, biannual exercises help prevent mineral deposits from jamming the valve. Regular testing confirms smooth operation and identifies early signs of malfunction before they escalate into safety hazards.
What Is the Correct Procedure to Test the T&P Valve?
To verify proper valve performance:
- Place a Bucket Under Discharge Pipe – Capture released water safely.
- Lift Lever Slowly – Allow water to flow through the discharge outlet.
- Observe Smooth Flow – Ensure continuous release without sputtering.
- Release Lever to Reseat Valve – Confirm that water flow stops immediately.
- Inspect Discharge Line for Leaks – Verify proper sealing and drainage.
Successful execution of these steps confirms that the valve will operate when needed.
What Are the Signs of a Faulty or Malfunctioning T&P Valve?
Indicators of T&P valve issues include:
- Continuous Drip or Leak – Valve fails to close fully after testing.
- Sputtering Discharge – Mineral buildup preventing smooth flow.
- No Water Release – Valve stuck closed, risking overpressure.
Detecting these warning signs prompts professional valve replacement and restores safe relief functions.
How Can You Optimize Your Water Heater’s Energy Efficiency?
Improving energy efficiency reduces utility costs, conserves resources, and enhances overall system performance. Simple adjustments such as thermostat settings, insulation upgrades, and usage habits yield measurable savings. Combining these optimizations with regular maintenance amplifies efficiency gains year after year.
What Is the Ideal Thermostat Setting for Efficiency and Safety?
Setting your water heater thermostat to 120 °F balances energy savings with scald prevention and bacterial control. At this temperature, households typically save 3–8 percent on heating costs while minimizing mineral buildup. Maintaining this setting also reduces the risk of accidental burns and deters bacterial growth within the tank.
How Does Insulating Your Water Heater and Pipes Save Energy?
Insulating the tank and hot water pipes reduces standby heat loss by forming a thermal barrier around the heater and distribution lines. A 0.5-inch foam jacket around the tank and pipe insulation on accessible lines can yield 7–16 percent annual energy savings. This simple upgrade keeps stored water hotter longer, requiring fewer heating cycles and lowering operating costs.
What Are Smart Usage Tips to Reduce Hot Water Waste?
Implementing behavioral and technical measures helps minimize unused hot water:
- Install Low-Flow Fixtures – Reduce water volume per use without sacrificing performance.
- Schedule Laundry and Dishwashing During Off-Peak Hours – Maximize tank recovery periods.
- Fix Leaks Promptly – Even small drips waste energy and accelerate mineral deposition.
Combining these habits with efficient settings ensures optimized resource use.
How Does Maintenance Improve Overall Energy Efficiency?
Regular flushing, anode rod care, and valve testing collectively maintain unobstructed heat transfer and secure pressure control. A sediment-free tank heats water faster and avoids extended heater run times. Tight fittings and calibrated thermostats prevent wasted heating cycles. Consistent maintenance sustains peak performance and steady energy savings.
What Are the Common Signs Your Water Heater Needs Professional Service?
Prompt recognition of system distress prevents minor faults from evolving into major failures. Professional evaluation addresses hidden issues, ensures warranty compliance, and delivers thorough repairs. Contacting experts at the first sign of trouble preserves comfort and avoids unexpected downtime.
How to Identify Leaks, Strange Noises, and Discolored Water?
Visible leaks around the tank or fittings signal corrosion or seal failure requiring immediate attention. Rumbling or popping noises often indicate trapped sediment that agitates as water heats. Brown or rusty water discoloration reveals internal rust or sediment release. Detecting any of these symptoms early triggers professional diagnosis and corrective action.
When Is Hot Water Inconsistent or Insufficient?
Insufficient hot water output, sudden temperature drops, or fluctuating heat levels point to thermostat malfunctions, sediment buildup, or element failure. Rapid recovery issues in tankless systems often stem from scale-clogged heat exchangers. Consistent monitoring of hot water performance helps pinpoint when professional intervention is necessary.
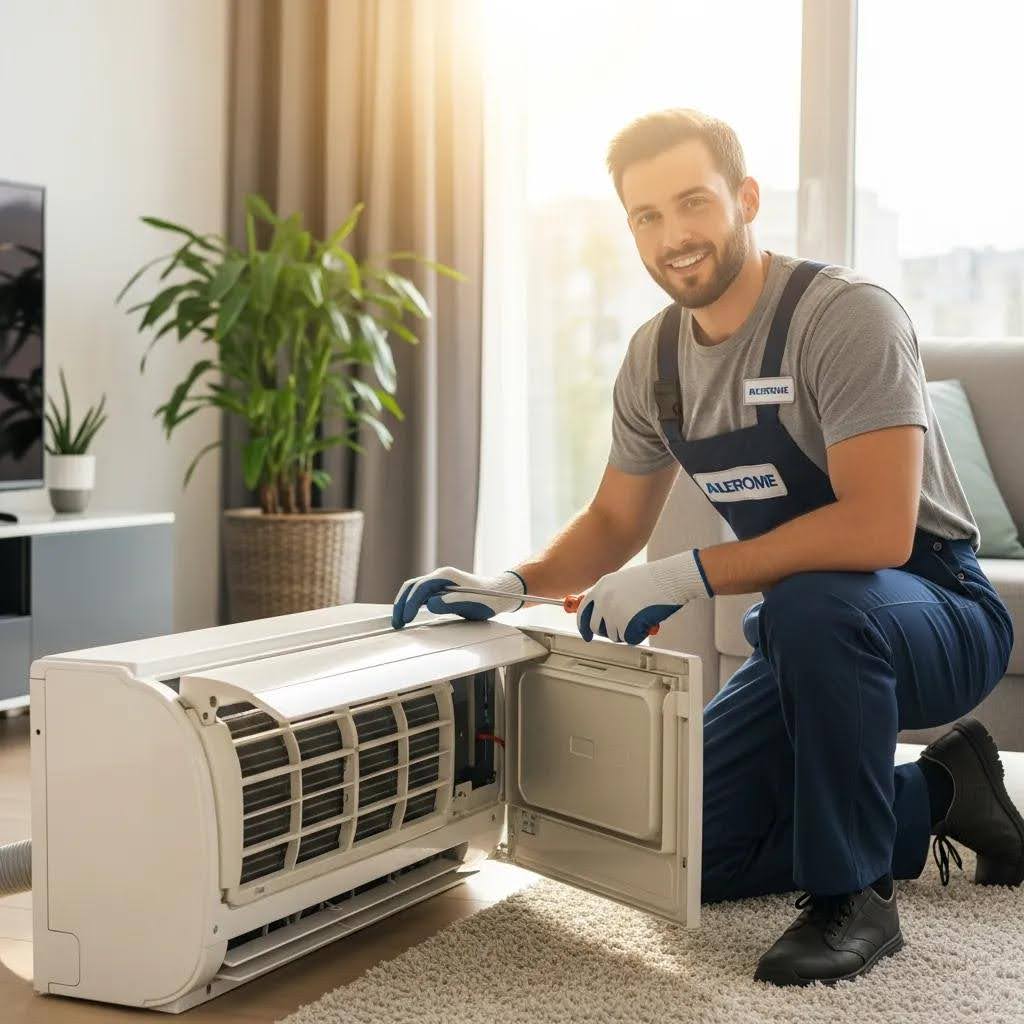
Why Should You Contact C. Carlin Plumbing for Water Heater Repairs?
C. Carlin Plumbing’s locally based licensed technicians bring over 150 years of combined experience to every service call, ensuring fast response and expert solutions. Their comprehensive plumbing and HVAC capabilities allow single-contractor coordination for complex water heater repairs or replacements. Honest, upfront pricing with solid workmanship guarantees offers customers peace of mind and quality assurance.
What Are the Benefits of Professional Annual Tune-Ups?
Professional annual tune-ups by C. Carlin Plumbing include thorough inspections of all components, targeted sediment removal, calibration of safety devices, and detection of hidden corrosion. These services maintain warranty compliance, optimize energy efficiency, and minimize the likelihood of emergency repairs. Investing in expert preventive care ultimately reduces lifecycle costs and ensures reliable hot water performance.
How Does Maintenance Differ Between Tank and Tankless Water Heaters?
Tank and tankless systems share core maintenance goals—sediment control, safety checks, and component integrity—but require customized approaches to match their designs and operational mechanics. Understanding these model-specific needs ensures each type achieves optimal longevity and efficiency.
What Are the Unique Maintenance Needs of Tank Water Heaters?
Tank water heaters demand regular sediment flushing to prevent insulating deposits and periodic anode rod replacement to combat corrosion. Storage tanks also require T&P valve testing and insulation upgrades to reduce heat loss. Visual inspections for rust spots, vent corrosion on gas models, and anode rod depletion are central to tank-style service.
How Is Tankless Water Heater Maintenance Performed?
Tankless units rely on continuous flow through a heat exchanger that can accumulate scale and mineral deposits. Maintenance involves descaling with a vinegar or chemical solution pump-through, cleaning inlet and outlet screens, and inspecting combustion vents on gas units. Ensuring clear water pathways and proper burner operation preserves the high efficiency that tankless systems promise.
How Often Should Each Type Be Serviced for Optimal Performance?
Storage tanks benefit from annual full flushes and rod inspections, with increased frequency in hard water zones. Tankless heat exchangers typically require descaling every six to twelve months, depending on water hardness and usage volume. Adhering to these schedules sustains manufacturer warranties, maximizes efficiency, and prevents unplanned downtime.